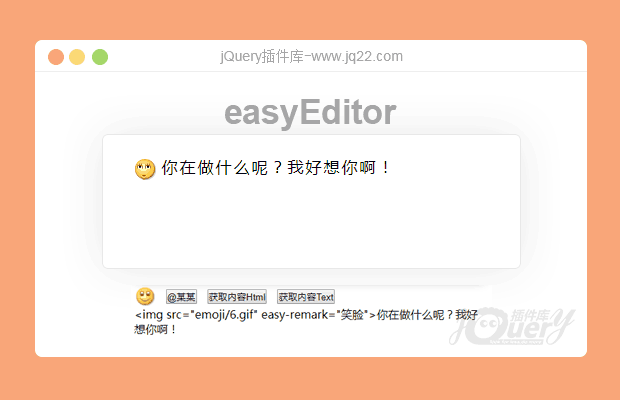

插件描述:这只是一个简单的编辑器,拥有插入表情,插入行块功能,支持IE9+,不依jQuery库
更新时间:2018/6/25 上午10:29:45
更新说明:添加了插入内容时可附带数据,该数据可在获取内容时一并返回,修复了谷歌浏览器有时换行失败的问题。
**这只是一个简单的编辑器,拥有插入表情,插入行块功能,支持IE9+**
演示网址:http://www.jq22.com/jquery-info17495
easyEditor
首先你需要引入css与JS
<script src="js/easyEditor.js"></script>
html你只需要一个div
<div id="editor" style="width:500px;height:300px;"></div>
我们需要实例化
var editor = easyEditor('editor');如果你需要placeholder
/**
* @param {string} placeholder实现
*
*/
editor.placeholder(str);
可以使用js关闭placeholder
editor.closePlaceholder();
插入表情
/**
 * @param {object} opt
 * @param {string} opt.src 表情路径
 * @param {string} opt.remark 表情说明
 * @param {object} opt.data 表情携带的数据,在getContent方法里面会按插入表情的顺序放回
 * @param {function} opt.afterInsert 插入后的回调函数
 *
 */
editor.insertEmoji({
    src: 'emoji/1.gif',
    remark: '笑脸',
    data: {
        id: 12
    },
    afterInsert: function() {
        //do something
    }
});
插入行块
* @param {
    object
}
opt
    *
    @param {
        string
    }
opt.text 文字 *
    @param {
        string
    }
opt.color 文字颜色 *
    @param {
        object
    }
opt.data 行块携带的数据, 在getContent方法里面会按插入行块的顺序放回 *
    @param {
        function
    }
opt.afterInsert 插入后的回调函数 *
    *
    /
editor.insertBlock({
    text: '@somebody',
    color: '#f00',
    data: {
        id: 123
    },
    afterInsert: function() {
        //do something
    }
});
获取编辑器里面的text
/**
* @param {object} opt
*
* @param {string} opt.emojiSign 表情的分隔符(默认为 |)
* @param {array} opt.emojiSign 表情的分隔符(默认为 ['|','|'])
*
* @param {string} opt.blockSign 行块的分隔符(默认为 |)
* @param {array} opt.blockSign 行块的分隔符(默认为 ['|','|'])
*
* emojiSign与blockSign接受字符串或者数组,如果是字符串则自动转换成内容一样长度为2的数组
* 例如 emojiSign = '|' 则或者的内容两边都为 |笑脸|
* 如果 emojiSign = ['[',']'] 则获取的内容为 [笑脸]
* 如果数组长度大于2,最终只会获取前两位的内容当成分隔符
*
* blockSign同上
*/
var myhtml = editor.getContent({
    emojiSign : ['[',']'],
    blockSign : '%%',
});
聚焦
editor.focus();
失焦
editor.blur();
光标定位最前面、最后面
/**
* @param {string} position 仅仅支持 'start' 或者 'end'
*
*/
editor.setPosition(position);
选中所有内容
editor.selectAll();
删除选中内容
editor.clearSelect();
删除所有内容
editor.clearAll();
添加换行
editor.changeLine();
更新时间:2018/5/29 上午9:27:32
更新说明:修改了MD文档,修复了光标获取不正确,考虑了更多用户的操作,新增API(具体请看MD文档)
首先你需要引入
<link rel="stylesheet" href="css/easyEditor.css" />
<script src="js/easyEditor.js"></script>
你只需要一个div
<div id="editor" style="width:500px;height:300px;"></div>
我们需要实例化
editor = easyEditor('editor');//表情
var emojiBtn = document.getElementById('emoji_btn');
var emojiBox = document.getElementById('emoji_list');
var emojiList = emojiBox.getElementsByTagName('img');
//揠定事件添加表情
for (var i = 0; i < emojiList.length; i++) {
addEvent(emojiList[i], 'click', function() {
var src = this.getAttribute('src');
editor.insertEmoji({
src: src,
remark: '笑脸'
}); //添加表情
emojiBox.style.display = 'none';
});
}
//At人
var atBtn = document.getElementById('atBtn');
addEvent(atBtn, 'click', function() {
//添加At人
editor.insertBlock({
text: '@某某',
color: '#f00'
});
});
//?取text
var showBox = document.getElementById('show');
var textBtn = document.getElementById('getTextBtn');
addEvent(textBtn, 'click', function() {
showBox.innerHTML = htmlEncode(editor.getContent({
emojiSign: '|', //表情分隔符
blockSign: '%' //行块分隔符
}));
});
//聚焦
var focusBtn = document.getElementById('focusBtn');
addEvent(focusBtn, 'click', function() {
editor.focus();
});
//失焦
var blurBtn = document.getElementById('blurBtn');
addEvent(blurBtn, 'click', function() {
editor.blur();
});
//光标定位前面
var setPositionStartBtn = document.getElementById('setPositionStartBtn');
addEvent(setPositionStartBtn, 'click', function() {
editor.setPosition('start');
});
//光标定位后面
var setPositionEndBtn = document.getElementById('setPositionEndBtn');
addEvent(setPositionEndBtn, 'click', function() {
editor.setPosition('end');
});
//选中所有内容
var selectAllBtn = document.getElementById('selectAllBtn');
addEvent(selectAllBtn, 'click', function() {
editor.selectAll();
});
//删除选中内容
var clearSelectBtn = document.getElementById('clearSelectBtn');
addEvent(clearSelectBtn, 'click', function() {
editor.clearSelect();
});
//删除所有内容
var clearAllBtn = document.getElementById('clearAllBtn');
addEvent(clearAllBtn, 'click', function() {
editor.clearAll();
});
//换行
var changeLineBtn = document.getElementById('changeLineBtn');
addEvent(changeLineBtn, 'click', function() {
editor.changeLine();
});
//添加placeholder
var placeholderBtn = document.getElementById('placeholderBtn');
addEvent(placeholderBtn, 'click', function() {
editor.placeholder('我们从这里开始...');
});更新时间:2017/12/25 下午2:20:05
更新说明:支持IE9,修改了md文档的描述,新增placeholder功能
easyEditor
首先你需要引入css与JS
<link rel="stylesheet" href="css/easyEditor.css" />
<script src="js/easyEditor.js"></script>
html你只需要一个div
<div id="editor" style="width:500px;height:300px;"></div>
我们需要实例化
var editor = new EasyEditor('editor');插入表情
/**
 * @desc 插入表情方法
 * @param {object} opt
 * @param {string} opt.src 表情路径
 * @param {string} opt.remark 表情说明
 * @param {function} opt.afterInsert 插入后的回调函数
 *
 */
editor.insertEmoji({
    src: 'emoji/1.gif',
    remark: '笑脸',
    afterInsert: function() {
        //do something
    }
});
插入行块
/**
 * @desc 插入行块方法
 * @param {object} opt
 * @param {string} opt.text 文字
 * @param {string} opt.color 文字颜色
 * @param {function} opt.afterInsert 插入后的回调函数
 *
 */

editor.insertBlock({
    text: '@somebody',
    color: '#f00',
    afterInsert: function() {
        //do something
    }
});
获取编辑器里面的html
var myhtml = editor.getContent(false);
获取编辑器里面的text
var mytext = editor.getContent(true);
属性
editor.sel; // selection 对象
editor.ran; // range 对象
editor.obj; // 编辑器对象(即文中id为editor的div);
PREVIOUS:
NEXT:
相关插件-丰富的输入
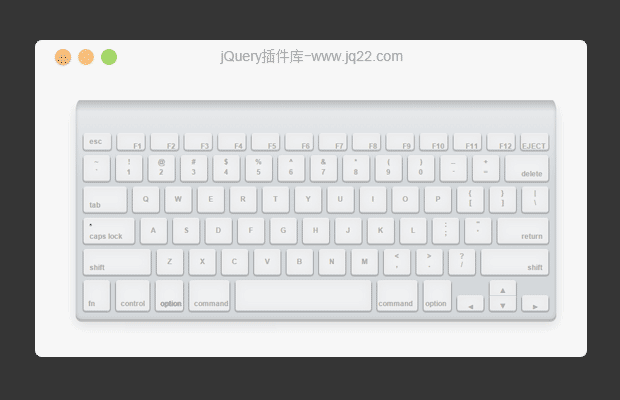
纯CSS3打造逼真的苹果(Apple)电脑键盘
这是一款使用纯CSS3制作的效果非常逼真的苹果(Apple)电脑键盘效果。该苹果电脑键盘可以通过按真实键盘上的相应键来触发虚拟键盘上的键,按键被按下时有逼真的动画效果。
丰富的输入
讨论这个项目(8)回答他人问题或分享插件使用方法奖励jQ币 评论用户自律公约
nadiaLiu 0
2018/8/26 18:34:32
-
插入表情后点击两次删除才能删掉表情。并且插入表情后,表情后边输入文字以后,光标定位到表情后是无法删除表情的
Lz7 0
2017/12/26 9:00:39
-
editor.placeholder(string);可插入placeholder功能我的git,欢迎交流https://github.com/lz7git/easyEditor
😃
- 😀
- 😉
- 😥
- 😵
- 😫
- 😘
- 😡
- 👍
- 🌹
- 👏
- 🍺
- 🍉
- 🌙
- ⭐
- 💖
- 💔
😃
取消回复
- 😀
- 😉
- 😥
- 😵
- 😫
- 😘
- 😡
- 👍
- 🌹
- 👏
- 🍺
- 🍉
- 🌙
- ⭐
- 💖
- 💔

